about
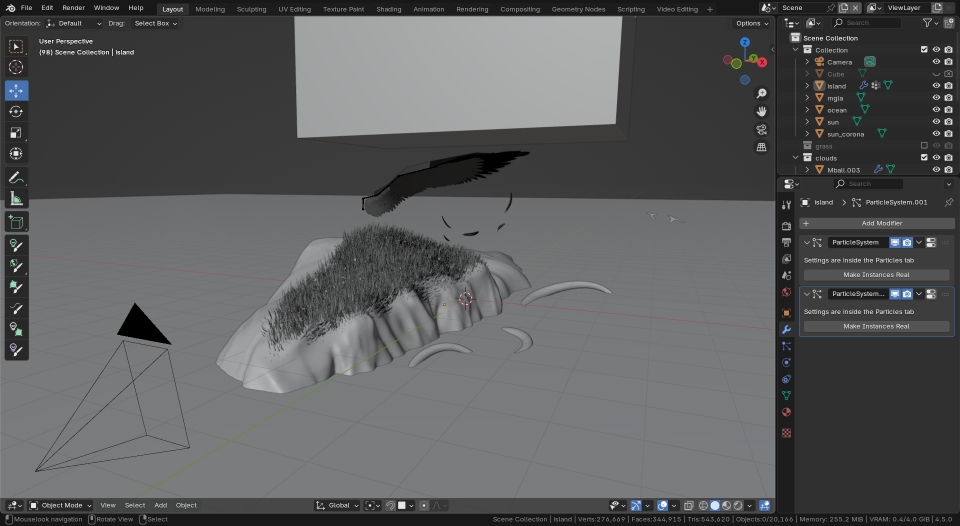
the Sky is where all 3d stuff lives
exactly what the title says
BBB
lorem ipsum????.
vethea is my comfort dimension
funny story: i started sculpting this one on new year's eve for no particular reason (other than i really like divine rpg mod for minecraft 1.7.10). and the designs for monsters: they're so Out There! like here's a few normal ones. crab. whale. ok that's cool that's great. cyclops. spiders. also kind of what you would expect. but then! twilight dimension mobs like cadillion, tomo or cori? what are they even supposed to be
blocky minecraft models Do Not Help with that!
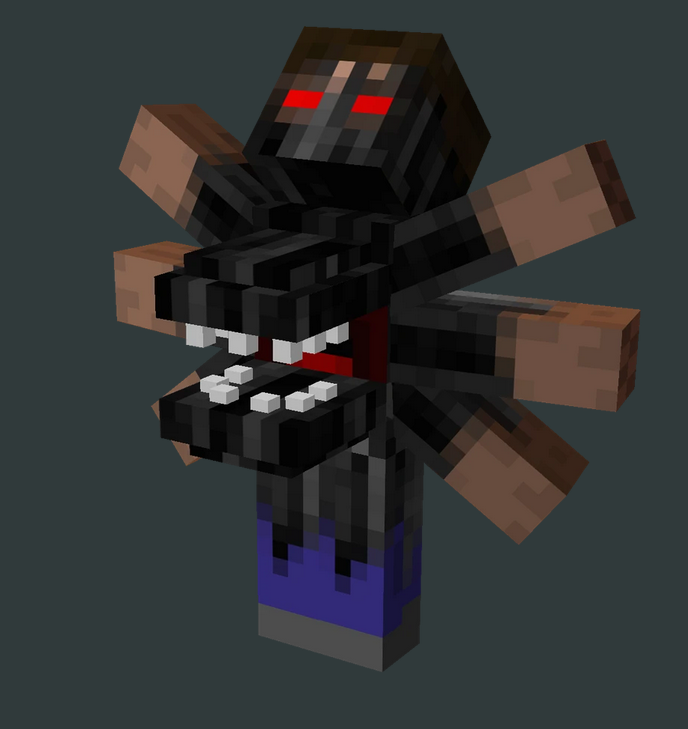
eventually you'll reach vethea and there's The Hunger. he wants you to come a little closer. he's also friendly and will sell you stuff. he's hungry (duh). he has some Dialogue even! i had a crush on him when i was thirteen.
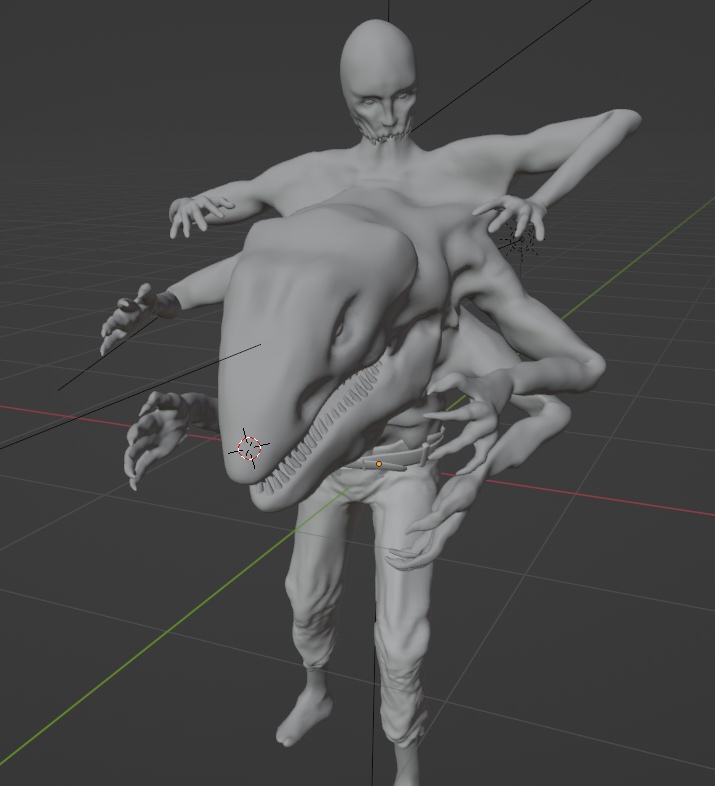
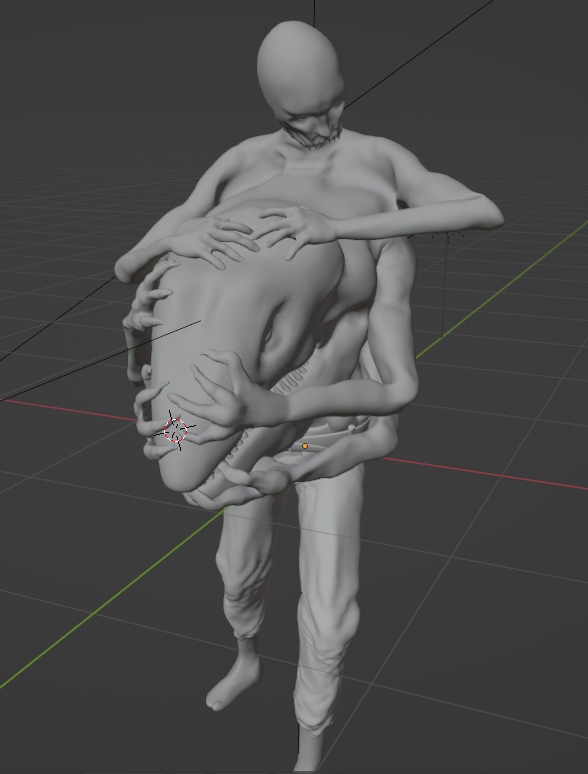
original model:
humble beginnings in zbrush:
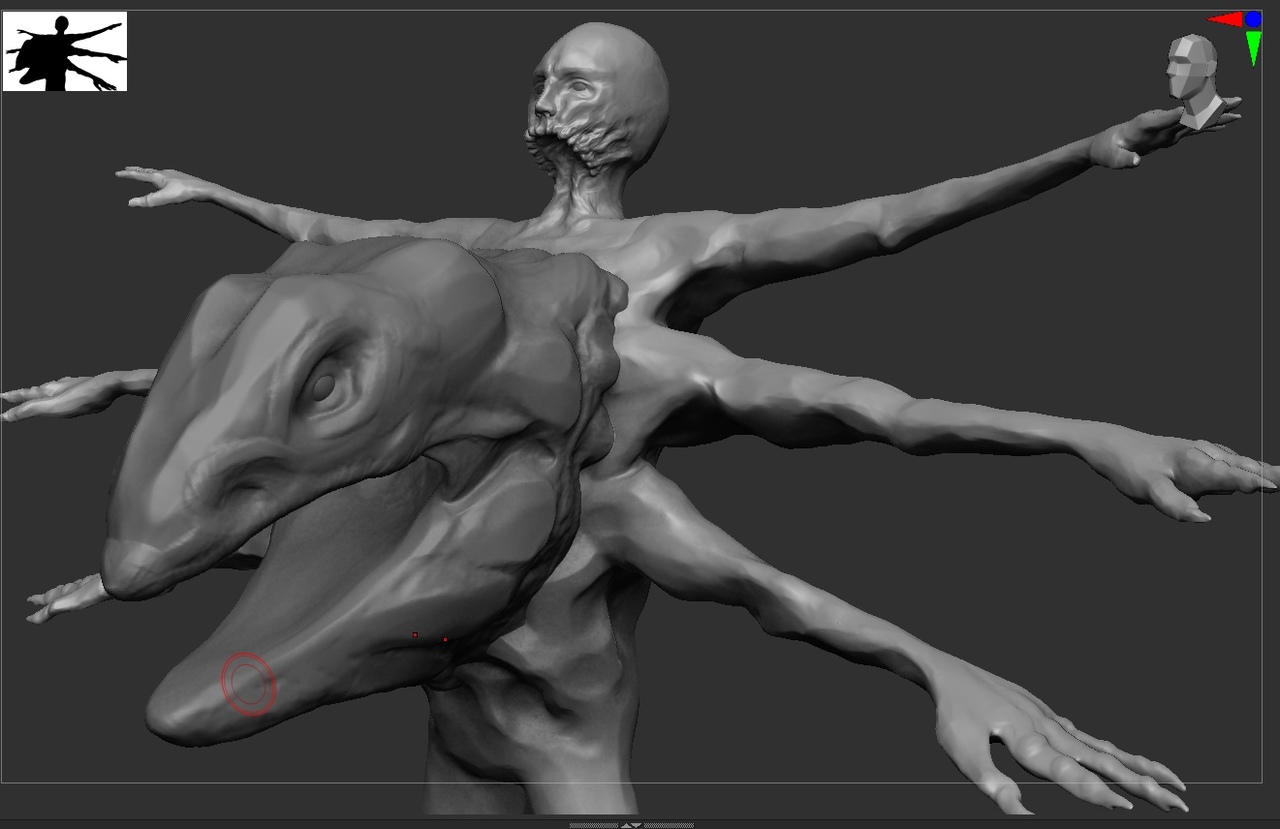
this is probably the first thing i made using the proper pipeline: sculpt in zbrush, retopology and uv-unwrap in blender, textures and maps in substance painter, then back to blender for everything else.
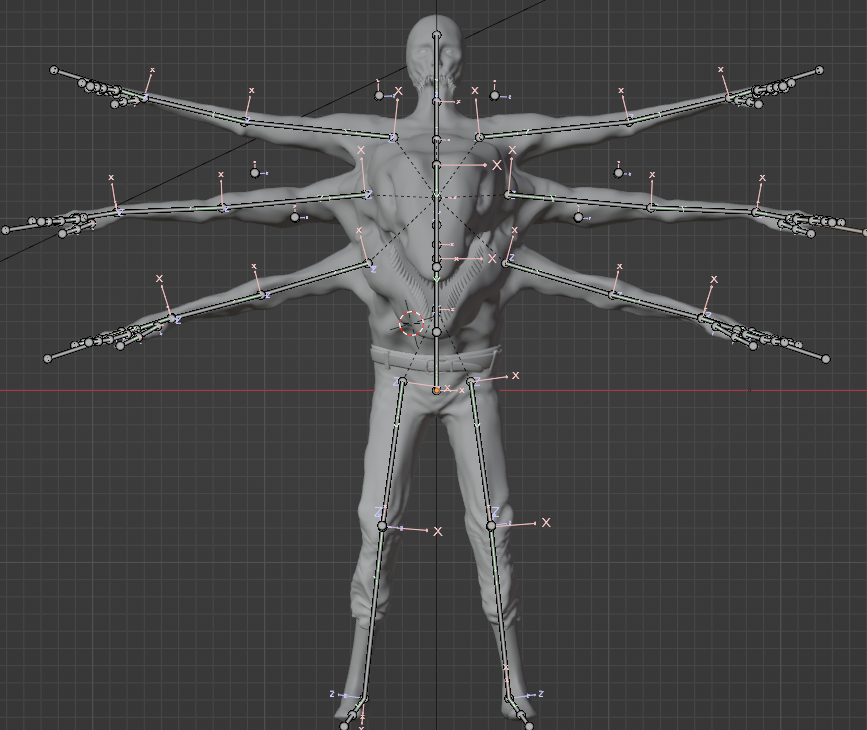
this one is unfinished. i gave up trying to rig six arms
and the animation frames or something:
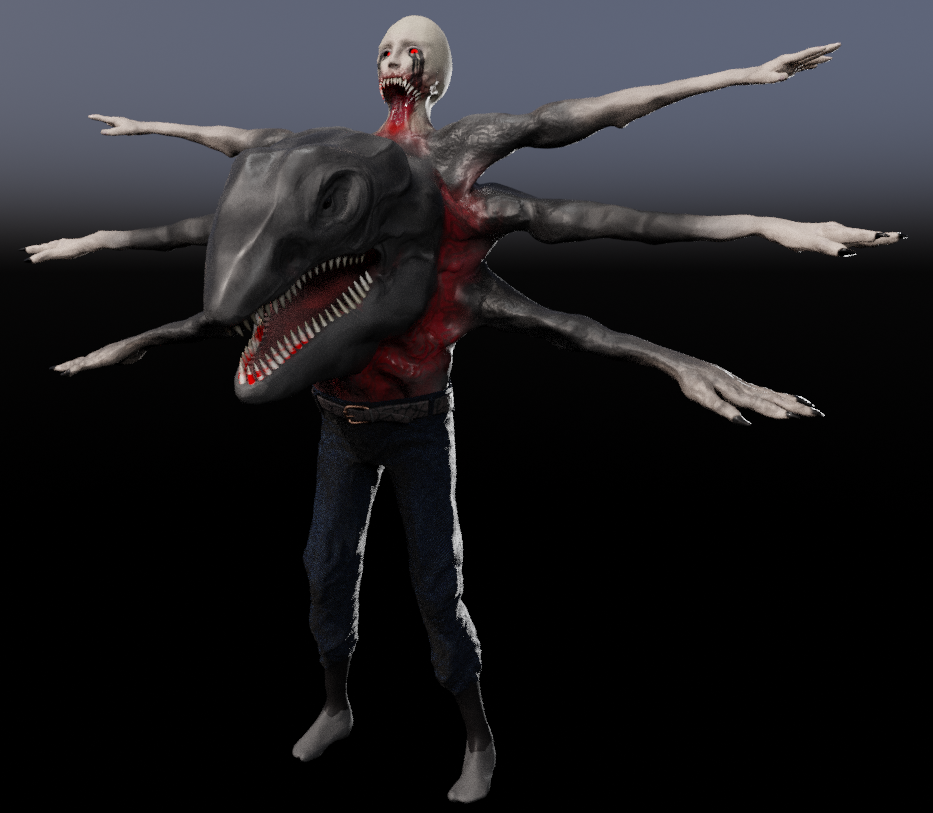
The Hunger lore is shrouded in mystery, so we don't really know if the dragon head can talk. in my fan interpretation it's the dragon head that does all the talking, a guy without a lower jaw is just along for the ride
bones! also his jeans keep clipping through everything sometimes (but data transfer modifier kinda helps with that)
i might come back and actually finish the rig and everything, but i'd have to redraw the textures (i was just learning substance painter then and it shows). also would have to do something about the model itself since it looks so awkward now... ok no more The Hungers then!
silly
a thing i made in an afternoon, the urge was too great to resist.
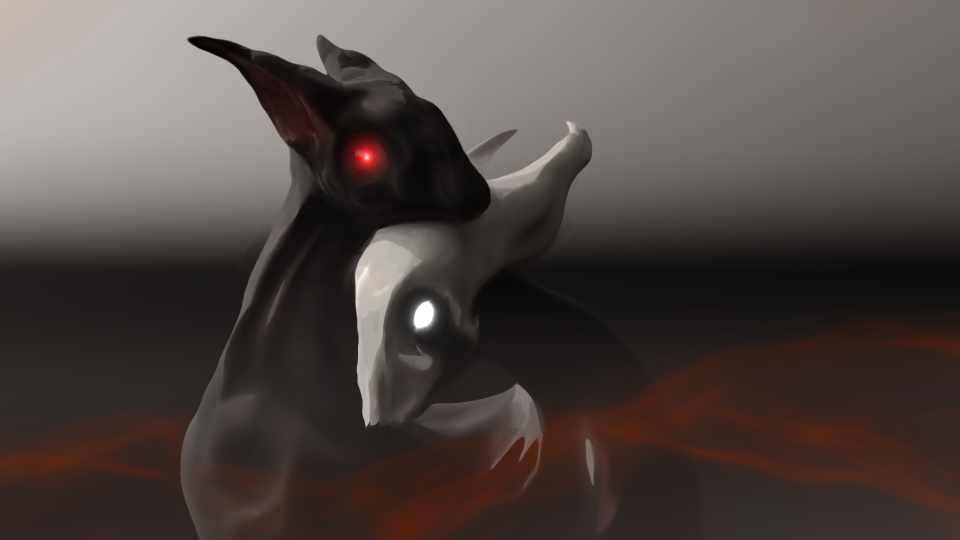
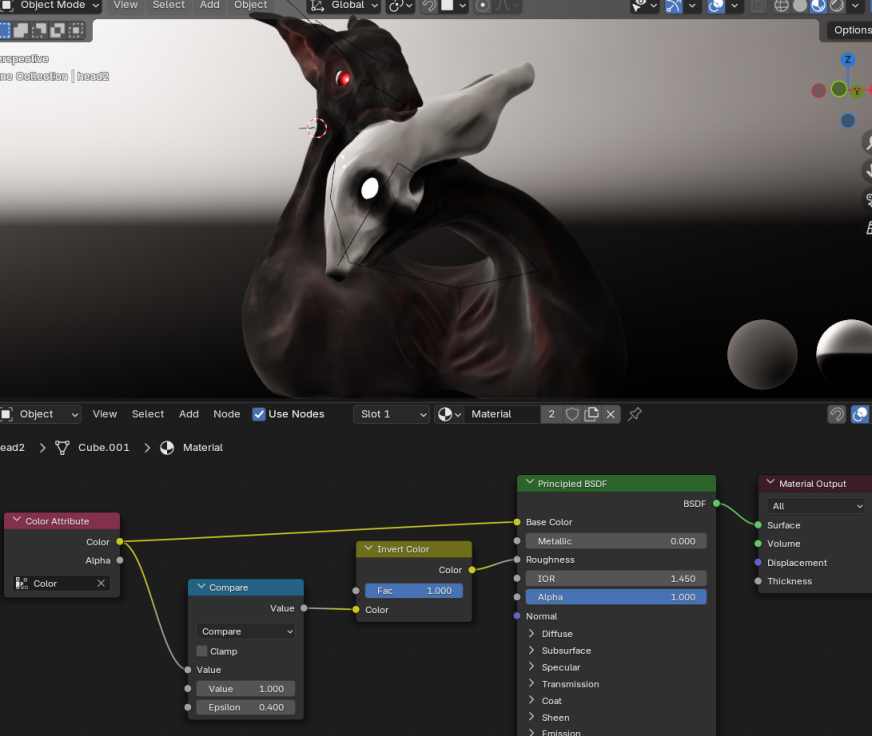
not a single retopology was hurt during the whole ordeal! both creatures were sculpted as a single object and then vertex-painted (the same thing as the polypaint in zbrush) instead of uv-unwrapping and painting the textures the normal way
the "color attribute" node here translates vertex color to actual color, also i used the same color attribute as a roughness map (invert node was unnecesary tho) to simulate light glinting off bone
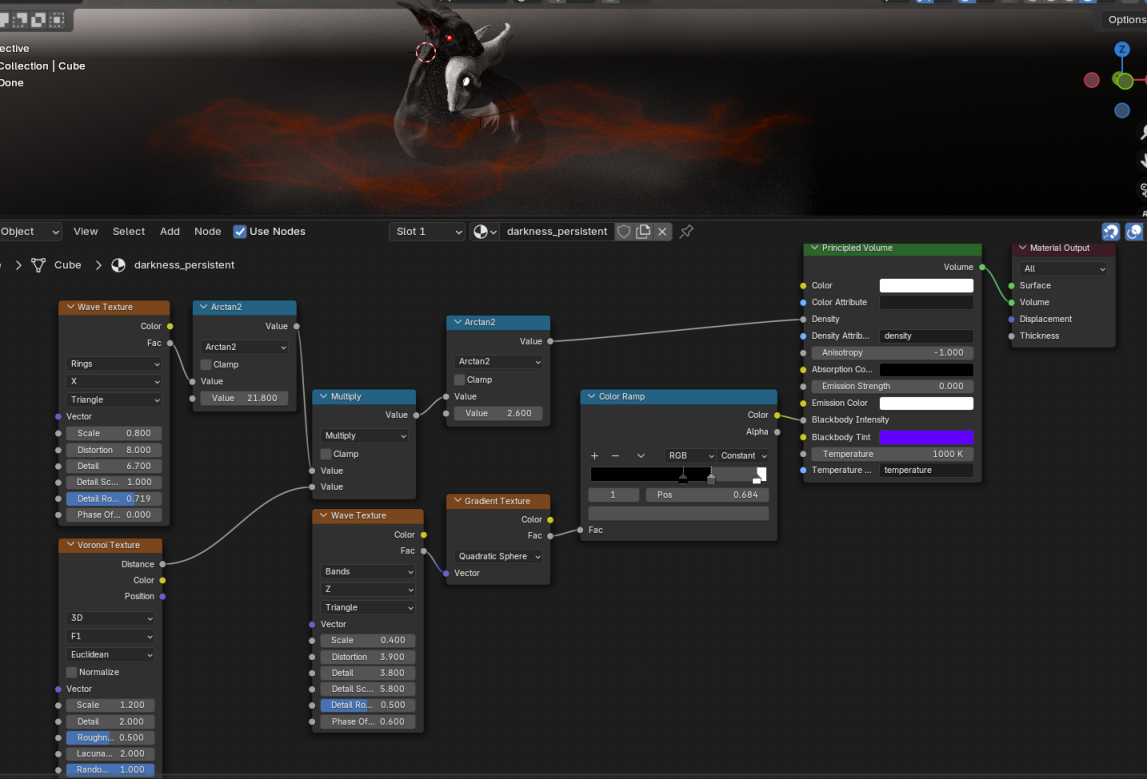
i decimated the topology before vertex- and weight-painting (from around 1 mil polygons to a more manageable 300k). also this red "wavy" effect is made using a giant volume cube that envelops the entire scene:
bbb
lorem ipsum??